How to design Pinterest pins that drive traffic
Looking to create eye-catching Pinterest pins that drive traffic?
Last year, I hired a Pinterest VA who unfortunately tanked my traffic to just 50 visits per month. I took back control and revived my Pinterest traffic within 3 months. With 20 years of experience in graphic design, I’m sharing the best practices, design tips, and standard pin specs to help you create eye-catching and click-worthy pins! Whether you’re a seasoned content creator or just starting out, follow this guide to design beautiful pins that stand out on Pinterest.
Pinterest standard pin specs and best practices
Ideal dimensions and aspect ratios for Pinterest pins
The standard size for any Pinterest graphic is a ratio of 2×3. That means that vertical graphics work best.
Pinterest squeezes all of its content into vertical columns that are the same width. Have you ever noticed that horizontal images rarely appear on your Pinterest feed? That’s because if you pin a horizontal image, you’re shooting yourself in the foot – your graphic will get squeezed, just like all graphics do, but it will appear extra squeezed (and barely noticeable) given its size.
As for a specific size to create your graphic, since Pinterest follows a ratio there’s not one standard size per se. I tend to design all of my graphics for Pinterest at 1000px wide by 1500px tall, which is the size that Canva uses for Pinterest.
You can make your Pinterest graphics even taller, but don’t make them too tall, because at a certain point it will automatically get chopped off at the bottom.
Using Rich Pins
Rich pins provide additional information directly on the pin, such as product details, recipe ingredients, or article headlines. By enabling rich pins for your content, you can provide more context, enhancing its visibility and usefulness to users, and encourage them to engage with your pins.
Creating Fresh Pins
To get the most out of Pinterest, you should play by their rules – the Pinterest algorithm has favored “fresh” pins for a while now. Fresh Pins are defined by Pinterest as images or videos that they haven’t seen before. You can create several images that link to the same blog post, page, or product listing, and each of those would be considered fresh when saved to Pinterest for the first time. Read more about Fresh Pins from Tailwind.


Fresh pins are new images – but you can create new Pinterest images for old content. Fresh pins can link to a URL you pinned before.
An easy way to create fresh pins is by creating pins using different titles for the same blog post. I create images for Pinterest using different titles for blog posts – and then match the text title of the Pin to the title I used in the image. Doing so can also help improve search engine visibility. When you use several different titles, you increase the chances of your content showing up in different search results, driving more traffic to your website. This strategy can also help you reach a wider audience, as different titles may appeal to different groups of people.
Use Pinterest templates to quickly and easily create a variety of images for Pinterest. Apart from my own Canva templates, Creative Market also offers a lot of different pin templates.
Optimizing Pin descriptions for search
Using relevant keywords and descriptive language in your pin descriptions can improve the discoverability of your pins through Pinterest’s search function. Consider what terms your audience might use when searching for content like yours and integrate those keywords naturally into your pin descriptions – or use them to mix up the titles for your fresh pins.
Add a call-to-action in your description to encourage users to click through to your content, driving traffic to your site.
Creating click-worthy pins
Make your pins pretty
Pretty pins receive more saves and clicks from users. When a pin is saved (or re-pinned), it increases its reach and drives more traffic to your website or blog posts.
This tip should be obvious, but I have seen some pretty cringe-worthy graphics pop up in my Pinterest feed, and I strongly believe (from experience) that pretty things will always perform better. Why? Because when a Pinterest graphic doesn’t look too great, it creates the impression that the content it’s promoting won’t be too great either.
Generally speaking, when something looks beautiful, professional, and attractive, people are more likely to click on it, buy it, share it, etc. So, spend some time creating Pinterest graphics for your brand that reflect the value of your content.
Create an eye-catching title
Take the time to understand who your target audience is and what type of content resonates with them. By understanding your audience’s preferences and interests, you can tailor your content, titles, and pin designs to better meet their needs and capture their attention.
When you’re creating your graphics, you want to think about what you want to stand out as someone’s scrolling on Pinterest. This plays into what you name your blog posts, obviously, as well as SEO. When you’re naming your posts consider how you can create a title that will stand out.
For example, which one of these titles sounds better:
- How to Launch
- How to Launch Your First Online Course in 60 Days
You’re more likely to click on the second title because the first one is too vague.
My favorite tool for creating a good title is the Co-Schedule Headline Analyzer.
Creating a consistent pin style for brand recognition
The purpose of using a Pinterest template is to establish consistency. The more consistent you are with the graphics you use for your brand and business, the more recognizable and trustworthy you will become for your audience. Use a consistent style in terms of color scheme, typography, and overall aesthetic.
Consider creating branded Pinterest templates on Canva that you can then use to quickly and easily create beautiful pins. Using templates will save you time when it comes to promoting your content. You can even use a template to create fresh pins and promote the same blog post over and over – just switch up your headline, rephrase your call to action, and you’re good to go!
Want to skip creating your branded templates from scratch and get started ASAP? Grab a set of customizable templates from my Canva Template Shop, no graphic design experience needed.


Choosing the right color palette
The use of color can significantly impact the overall look and feel of your pin. Using your branding elements, such as your logo or brand colors, can help increase brand recognition and make your pins more memorable.
But if your brand colors don’t stand out in the Pinterest feed, you can experiment with different colors on your Pinterest pins more easily than on other platforms. That’s because your pins will mostly be on their own in search results or the home feed. Creating a few different styles is a great way to create fresh pins that will attract different people to your content.
Pin designs using warm colors are said to perform better than those using a cold color palette, but you may want to A/B test to find out whether this is also true for your content and audience.
Choosing high-quality images and graphics
When designing Pinterest pins, make sure to use high-quality, gorgeous images. Whether you’re using stock photos or your own photography, ensure that the visuals align with your brand and content. Additionally, use eye-catching graphics such as icons to make your pins stand out.
Unsplash has gorgeous free photos that you can use in your pin designs. For premium photos, I love Styled Stock Society and Creative Market.
Add large, easy-to-read text
My Pinterest pin designs with very large, easy-to-read text perform best. Although the text may be easy to read for you when you create your graphic, it might not be when it’s shrunk down and squished into the vertical columns on Pinterest.
Add text in a color that complements your image and catches the user’s attention as they scroll. Add a call-to-action on your pin image to encourage click-throughs and drive traffic to your site.
There are two major points to pay attention to when adding text to an image: contrast and position.
Add text to images: Contrast
Contrast is about making sure the text is readable. Don’t use white text on a light background image, or dark text on a dark background image. If you have a busy image, lighten or darken the image. You can do so by putting a white or black partially transparent layer on top of it. That will allow for better contrast between the image and the text.
Alternatively, you can add an overlay with a background color that matches your brand and helps the text to stand out.

Add text to images: Position
Position is about where you put the text on the image. The center of the image can be good, and is a fairly easy way that’s generally fail-proof.

Don’t put the text on the very edges, that usually makes it look cramped and awkward. If you want to put it in a more interesting place on the image, play around with the rule of thirds. Divide your image into three equal size sections horizontally as well as vertically, so you end up with 9 equal size sections on your image.
In professional photos, you will notice the photo’s subject is usually on one of the intersections between the horizontal and vertical lines. You’ll want to put your text on such an intersection too.
Don’t put it over the subject, instead give it space by using the intersection diagonally opposite of it. If the photo’s subject isn’t on such an intersection, play around with placing the text on the different intersections and see where you like it best.

Using Canva to design your Pinterest pins
Canva makes it easy to create graphics for your blog or business. You can create images from scratch or use Canva templates.
Create a new design
To create a new graphic in Canva, click the “Create a design” button and choose the type of image you want to create, such as a Pinterest pin.

Add elements to create your Pin design
Once you have your blank canvas, you can use the tools on the left-hand side to add elements like shapes, icons, and photos.

Add text to your image
After you have your desired image, you can click on the “Text” tab on the left-hand side and select a text style to add text to your image. If you’ve set up your brand kit in Canva, select a font from your brand kit to use in your Pin design.

Finally, you can customize the font, size, color, and alignment of the text to make it look exactly how you want. It’s very important that your text is easy to read, so if you need to change fonts to make your Pinterest images easier to read, do so!
Optimizing your pin designs by A/B testing
A/B testing different pin designs can provide valuable insights into what resonates with your audience and drives the most traffic. Use Pinterest analytics to track the performance of your pins, understand what content resonates with your audience, and identify opportunities for improvement. Experiment with variations in imagery, text, and layout to identify the most effective pin designs for your content.
Now that you know how to design Pinterest pins, you may want to add a custom Pin It button on your website so visitors can easily pin it to their Pinterest boards. More pins mean more eyes on your content, which can help drive more traffic to your website and grow your audience.
Hopefully these tips help you get started in creating beautiful graphics that will stand out on Pinterest. If you’re stuck with your graphics, head over and check out the Pinterest templates in my shop. Templates are a great way to quickly create beautiful graphics without stress or frustration.
37 lead magnet ideas for health and wellness coaches
Looking for lead magnet ideas for your coaching biz? Here are 37 lead magnet ideas for coaches in the health and wellness niche that you can use to grow your email list. Whether your focus is on self-care, mental health, healthy eating & recipes, meditation, stress reduction and mindfulness, fitness, or sleep — this list has you covered. Dive in, pick an idea that resonates, and create your lead magnet!
Lead magnet ideas about self-care
- Self-care checklist: Create a self-care checklist that includes daily habits that promote mental and emotional well-being.
- Mind-body connection guide: Offer a guide to understanding the mind-body connection and how it affects overall health and well-being.
- Goal-setting worksheet: Provide a worksheet that helps people set achievable health and wellness goals.
- Healthy lifestyle quiz: Create a quiz that helps people assess their current lifestyle and offers suggestions for improvement.
- Healthy habit tracker: Offer a habit tracker that helps people stay accountable to their health and wellness goals.
- Health and wellness journal prompts: Provide journal prompts that help people reflect on their health and wellness journey and set goals for the future.
- Wellness retreat guide: Provide a guide to wellness retreats and the benefits of taking time for self-care and rejuvenation.
Lead magnet ideas about mental health
- Mental health resource list: Provide a list of mental health resources that people can turn to for support and guidance.
- Mental health self-assessment: Offer a self-assessment tool that helps people evaluate their mental health and identify areas for improvement.
Lead magnet ideas about healthy eating & recipes
- Healthy recipes e-book: Create an e-book filled with healthy recipes that are easy to make and delicious.
- The Ultimate Guide to Mindful Eating: Teach your audience about mindful eating and offer a guide on how to incorporate this practice into their daily lives.
- Meal prep guide: Teach your audience how to meal prep efficiently and effectively for healthy eating throughout the week.
- Healthy snack ideas: Offer ideas for healthy snacks that are easy to make and perfect for when hunger strikes.
- Smoothie recipe guide: Offer a guide to making healthy and delicious smoothies that your audience can enjoy for breakfast or as a snack.
- Hydration guide: Teach your audience about the importance of hydration and offer tips for drinking enough water throughout the day.
- Healthy eating on a budget guide: Offer tips and strategies for eating healthy on a tight budget.
- Meal plan template: Offer a meal plan template that people can use to plan out their meals for the week.
- Healthy eating grocery list: Offer a grocery list that includes healthy foods and beverages to make shopping for healthy meals easier.
Lead magnet ideas about meditation, stress reduction & mindfulness
- Meditation recordings: Record guided meditations that your audience can listen to whenever they need to relax and de-stress.
- Stress-reducing tips: Share tips and techniques for reducing stress in daily life, such as deep breathing exercises and journaling prompts.
- Mindfulness challenge: Create a mindfulness challenge that helps people cultivate a daily mindfulness practice.
- Stress-management toolkit: Offer a toolkit that includes tools and strategies for managing stress in daily life.
- Mindfulness journal prompts: Provide journal prompts that help people cultivate a daily mindfulness practice.
- Mindfulness meditation challenge: Create a meditation challenge that helps people build a daily mindfulness practice.
- Mindfulness coloring book: Create a coloring book filled with mindfulness-themed designs to promote relaxation and stress relief.
- Mindfulness workshop: Host a mindfulness workshop to teach people about the benefits of mindfulness and how to cultivate a daily practice.
Lead magnet ideas about fitness
- Fitness planner: Create a fitness planner with daily exercise routines, tracking sheets, and progress reports.
- At-home workout plan: Create an at-home workout plan that doesn’t require any equipment and can be done in a small space.
- Fitness challenge: Create a fitness challenge that lasts for a set amount of time and helps people build strength and endurance.
- 30-day yoga challenge: Create a yoga challenge that lasts for 30 days and helps people build strength and flexibility.
- Posture improvement guide: Teach your audience about the importance of good posture and offer tips for improving posture throughout the day.
- Home workout equipment guide: Offer a guide to home workout equipment that people can use to create a home gym.
- Fitness tracker template: Provide a fitness tracker template that people can use to track their workouts and progress.
- Fitness challenge tracker: Provide a tracker that people can use to track their progress during a fitness challenge.
- Fitness motivation guide: Provide tips and strategies for staying motivated to exercise and build healthy habits.
Lead magnet ideas about sleep
- Sleep guide: Offer tips and strategies for improving sleep quality, including sleep hygiene practices and relaxation techniques.
- Sleep hygiene checklist: Provide a checklist of habits and practices that promote healthy sleep hygiene.
There are many different types of opt-in freebies that can help you to attract potential customers. With this list of ideas for health and wellness coaches, I hope you can find or come up with a great idea for a lead magnet for your coaching business! Whether you’re going to create a workbook, checklist, calendar, planner, ebook or cheatsheet – if you don’t want to start from scratch and save hours creating your opt-in freebie, get one of my E-book/Workbook Templates to get started quickly! They’re available in US Letter as well as A4 size.
Need help creating your lead magnet or setting up the tech for it? Work with me.
How to create a shareable calendar for your course
Do you want to communicate upcoming course events with your students in an easy way? Whether you prefer using Google Calendar or Apple Calendar, follow my step-by-step guide to create a shareable calendar that will effectively communicate upcoming course events. I cover how to add events and how to create an “add to calendar” link to share with students so they can add the events to their own calendar apps. Providing this for your customers will help them stay up-to-date and be prepared for each event in your course or group program. So keep reading to learn how you can use your favorite calendar applications to create and share a calendar – for free!
Creating a Shareable Calendar Using Google Calendar
Google Calendar is a popular calendar application that is free to use. Here’s how to create a shareable calendar using Google Calendar:
Setting up a new calendar
- Go to Google Calendar and sign in with your Google account.
- On the left-hand side, click the “+” button next to “Other calendars.”
- Select “Create new calendar.”

- Name your calendar and add a description if desired.
- Click “Create calendar.”

Adding course events to the calendar
- Click on the date and time you want to add an event to.
- Enter the event details, including the title, date, time, and location. Make sure to select the correct calendar to add the event to.

- Click “Save.”
Generating a link to share with students
- Click on the three dots next to your calendar name.
- Select “Settings and sharing.”

- Under “Access permissions for events”, make sure to check the box to make the calendar available to public.

- If you get the shareable link from the button in this section, it will give you a link that only other Google Calendar users can use.
- To provide the calendar to all students no matter what calendar they use, scroll down to the “Integrate calendar” section.
- Copy the link that’s listed in “Public address in iCal format.”

You can now share this link with your students so they can add the event calendar to their own calendar application.
Creating a Shareable Calendar Using Apple Calendar
Apple Calendar is a calendar application that comes pre-installed on Macs and iOS devices. Here’s how to create a shareable calendar using Apple Calendar:
Creating a new calendar
- Open Apple Calendar.
- Click on “File” and select “New Calendar.”

- Name your calendar.
Adding course events to the calendar
- Right-click on the date you want to add an event to and click New Event.
- Enter the event details, including the title, date, time, and Zoom link.

- Click “Add.”
Generating a link to share with students
- Right-click on your calendar name.
- Select “Share Calendar”.

- Check the box next to “Public Calendar” and click Done.
- Right-click your calendar again, and select “Copy URL to Clipboard”.

You can now share this link with your students so they can add the events to their own calendar.
Using an Add to Calendar link generator
If you have a small group of students (at the time of writing, 20), you can also use the free plan of AddEvent.com to create a free Add to Calendar button. If you’re sharing the calendar with a larger group, you would need to sign up for a monthly or annual plan to use AddEvent’s add calendar button. The above options to create shareable calendars directly from your calendar tool are always free, no matter how many people subscribe to your calendar.
Sharing a single event
If you’re only sharing a single event, it may be easier to just create the event and copy the invite link for it instead of sharing a full calendar.
Adding the calendar links to your course materials
Include your “Add to Calendar” link in an email or on your course website so students can easily access it. If you can, add calendar links that can be used in any calendar applications your students may use. Google Calendar provides you with both a link to share with other Google Calendar users as well as a link to an ICS file, which can be used with any other calendar tool.
Apple Calendar provides you with a webcal link. Some course platforms may not allow linking to those links, in which case you can set up a redirect on your website so you have a regular link to use in your course platform, but it automatically redirects to the actual webcal link.
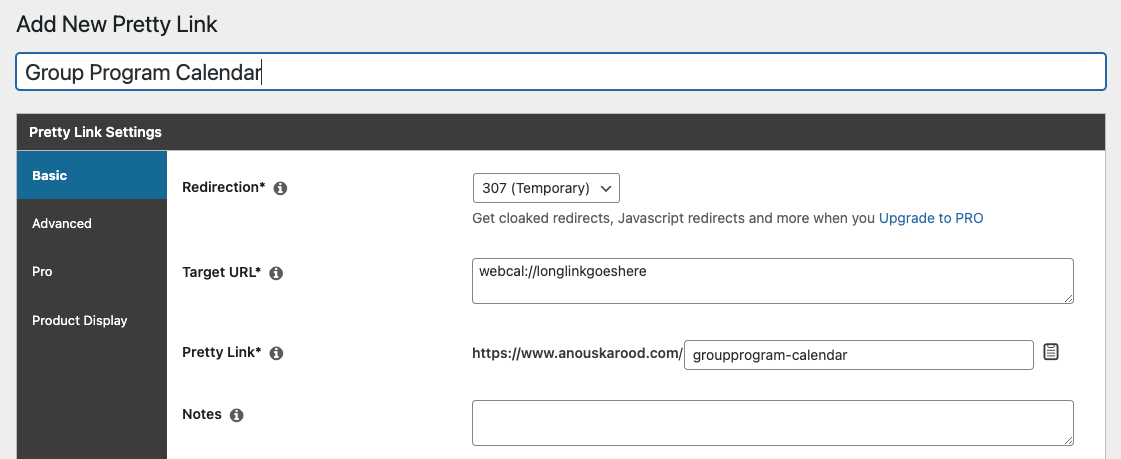
How to set up a redirect to a webcal link in WordPress
In WordPress, I like the free plugin Pretty Links to set up redirects. Once installed, go to Pretty Links in your admin area and click Add New. Simply paste your webcal link in the Target URL field, and create a pretty URL that you can use to share.
How to set up a redirect to a webcal link in Squarespace
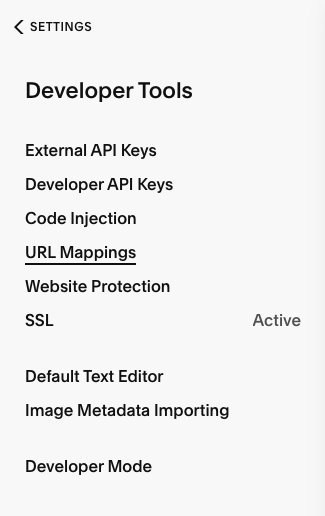
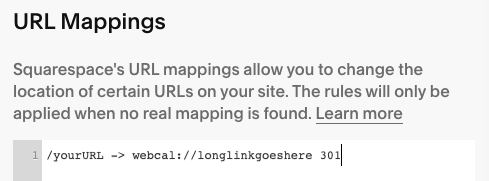
In Squarespace, go to Settings > Developer Tools > URL Mappings.
In the URL Mappings field, put your nice URL, an arrow, the webcal link, and 301 like this:/yourURL -> webcal://longlinkgoeshere 301
Sharing the calendar link
You can use the link you’ve generated from your calendar application like any other link, such as adding it to an email or creating an “Add Calendar” button inside your course or on your website.
When students click the link to the shared calendar, their preferred calendar tool should open and either automatically add the calendar or prompt them asking whether they want to add the calendar.
Tips for Effectively Communicating Upcoming Course Events
Once you have created your shareable calendar, it’s important to effectively communicate upcoming course events to your students. Here are some tips:
Using clear and concise language
When adding an event to the calendar, make sure to use clear and concise language so students understand what the event is and why it’s important.
Providing context for each event
Include any necessary details about the event, such as the link to the Zoom room and what topics will be covered.
Reminding students of upcoming events
Send reminders to your students a few days before each event to ensure they don’t forget.
Encouraging students to add the calendar to their own devices
Remind your students to add the calendar to their own devices so they can stay up to date on upcoming events.
A step-by-step guide to lead magnets: grow your email list
Are you looking to grow your email list and attract potential customers? Lead magnets are the answer! In this step-by-step guide, I explain what lead magnets are, why they’re essential for online businesses, and provide tips on creating effective lead magnets that resonate with your target audience. Plus, I’ll give you a comprehensive list of lead magnet ideas to help you get started.
What Is a Lead Magnet, Content Upgrade, or Opt-In Freebie?
Lead magnets, content upgrades, and opt-in freebies are all essentially the same: a free but valuable resource that you offer to potential customers in exchange for their contact information, usually their first name and email address. This could be anything from a free ebook, checklist, challenge, and more. There’s a comprehensive list of lead magnet types below. The purpose of a lead magnet is to attract potential customers and grow your email list. It’s a way to provide value to your audience and establish trust with them.
The name “lead magnets” indicates that they are designed to attract leads by offering something of value in exchange for their contact information, and “opt-in freebies” means they are free resources and that a person needs to opt in before receiving it.
Content upgrades are incentives directly related to specific pieces of content such as blog posts, podcast episodes, or videos. The goal is to engage individuals who are already consuming that content and provide them with additional bonus material in return for their contact details. For instance, if you have a blog post with tips for creating a self-care routine, a content upgrade could be a downloadable checklist encompassing all the mentioned tips. This allows interested readers to ensure they implement all the tips when crafting their own self-care routine.
Why are lead magnets important?
Lead magnets are essential for online businesses because they help attract potential clients and grow your email list. With a larger email list, you can reach more people with your marketing messages and increase your chances of converting them into paying clients.
1. Lead magnets provide a steady flow of leads to support your business.
As a small business owner, your time, energy, and manpower are limited when it comes to promoting your business, so it’s important to be strategic and automate what you can when it comes to marketing. Using email marketing software, you can automate the process of capturing leads from your website and promptly deliver the lead magnets they sign up for. Once they’re signed up, you can send them an email series that introduces them to your business, products, and services (commonly known as a welcome sequence, or nurture sequence). You can tag and segment them based on the emails they open, the links they click on, and the sequences they complete. This way, you can send them more personalized messages in the future. Once your email marketing shows success, all you need to do is bring in high-quality traffic to your lead magnet landing page and you can be confident that it will result in conversions.
2. Lead magnets will give you valuable insight through subscriber data.
Lead magnets offer valuable subscriber data, allowing you to understand your target audience’s interests and enhance your marketing tactics. For example, you can identify the topics a subscriber is interested in based on which lead magnet they opted in for. Additionally, by analyzing the landing page where most subscribers signed up, you can calculate its conversion rate and figure out the elements that made it more effective. Finally, based on your highest-performing lead magnet, you can gain insights into your audience’s primary interests and create or adjust your products and services accordingly.
3. Lead magnets can help you book more clients and get more customers.
Everyone wants to make sure they’re getting their money’s worth when making a purchase. So when your FREE lead magnet proves helpful to potential customers, they’re much more likely to purchase your paid offers. With your lead magnet, you can show potential clients and customers that you know what you’re talking about and you’re the right person to help them. However, if you fail to deliver the value they’re hoping to get from the lead magnet, it discourages potential clients or customers from booking your services or buying your products.
Should lead magnets be free?
Yes, lead magnets should be free. The purpose of a lead magnet is to attract potential customers and provide them with value. By offering something for free, you’re building trust and positioning yourself as an expert in your industry.
Lead Magnet Ideas to Grow Your Email List
There are many different types of opt-in freebies that can help you to attract potential customers. Some of the most popular types of lead magnets include:
Ebooks
Full-length ebooks are generally less effective for lead magnets. They can be too long and detailed, which means people may not finish them and thus not get the value they were hoping for. Instead, consider a shorter PDF guide. Something less lengthy can be a great way to educate your audience and give them a quick win. They don’t have to take a long time to create; using my Ebook & Workbook templates for Canva, you can easily design a short ebook or guide that will attract potential clients.
Fillable workbooks and worksheets
A workbook or worksheet offers your audience the opportunity to see what it would be like to work with you by walking through one of your core processes. If your workbook helps someone get to the core of a problem, or experience a business breakthrough, you can bet they’ll be interested to hear about the products and services that you offer to help take them a step further.

Learn how to create fillable workbooks and worksheets using Canva using my tutorial here.
Checklists
Checklists are awesome to provide alongside a post about some sort of process that you would recommend going through. Do you have a go-to process for something in your life or business that makes things quicker, easier, or better? If so, your audience might be interested to hear about it… and then get it from you in a checklist format.
Checklists are short, typically one-page-long PDFs that explain how to complete a certain process step-by-step. They generally convert well because they’re easy to skim and give your subscriber a quick win if they simply follow the step-by-step process.

You can create checklists easily by using my Ebook & Workbook templates for Canva.
Calendars or planners
If productivity and time management are your jam, offering a calendar, planner, or agenda that totally jives with your philosophy on productivity might work for you. Maybe you find it beneficial to have a habit tracker included in your daily agenda, or maybe you find monthly calendars to be way too cumbersome. Why not design a custom alternative for your audience?

My Ebook & Workbook templates for Canva also include pages for calendars, planners, and habit trackers.
Cheatsheets
Cheatsheets are almost identical to checklists. The only difference is that a cheat sheet gives tips and shortcuts to achieve a certain task instead of showcasing step-by-step instructions. You can give some useful suggestions to speed up a certain task or process, and include keyboard shortcuts for the tool or tools used to complete that task.
Templates
These give subscribers an easy way to kickstart their projects and can be especially effective for designers and copywriters. If you’re a service provider focusing on a specific platform, like a Pinterest manager, you could also offer templates for the platform you specialize in.
Swipe files
A swipe file is a document containing a copy-and-paste solution for something. For example, if you wrote a blog post about the benefit of using canned e-mail responses, you could offer a swipe file with a handful of your own canned e-mail templates that readers could copy and paste to use in their own business.
Email Courses & Challenges
Email courses are a collection of email lessons that are sent out to subscribers each day. You can set this up as an automated sequence in your email list provider, like Mailerlite (affiliate link) or ConvertKit (affiliate link), so the emails are sent out to subscribers automatically.
Email challenges can be set up the same way, but you can also host a mini-course or challenge in a course platform if you’re already using one for paid courses.
Free email courses and challenges provide an engaging way for your audience to learn about your topic in detail. You could create 5-day or 7-day challenges focused on nutrition tips or fitness exercises – whatever your specialty may be!
Emails should be short but informative, and each email should give readers an action to do that day, or another way for them to get a quick win from each email.
Keep in mind that you don’t necessarily need to offer up an entire course in order to get people to sign up. In cases where you’re trying to lead people into buying a course with a steep price tag, you could unlock one module and exchange that for an e-mail address to give people a taste of what you’re offering.
Video Trainings & Webinar Replays
A video training allows you to go more in-depth into a certain topic, but you can also set up a recording of a webinar as your opt-in freebie.
If you’ve hosted a webinar at any point in your business, it’s likely that the replay was sent out to the original mailing list and has since been collecting dust on your computer. Assuming the content is still relevant, why not try offering it to new leads?
You may need to crop out your pitch, or any mention of the product you were likely promoting at the time of hosting. Otherwise, this opt-in idea should take virtually no time or effort to create, but it’s an incredibly high-value item to offer your audience.
Quizzes
Quizzes tap into our natural curiosity and desire for knowledge, making them irresistible to participate in. By offering visitors the chance to discover something about themselves, quizzes create a sense of excitement and personalization that other lead magnets often can’t match. One key advantage of using quizzes as lead magnets is that they provide instant gratification. Unlike ebooks or webinars that require time and commitment from the user, quizzes offer immediate feedback and results. This instant gratification not only keeps users engaged but also increases the chances of them sharing their results on social media or with friends, generating organic referral traffic for your website.
Make sure to tailor quiz questions to align with your target audience’s pain points or interests, so you can gather valuable insights about your leads that can help you personalize future marketing efforts.
Free trials
If you offer a membership, offering a free trial as your lead magnet could be worthwhile. This allows people to test out your membership before they need to pay anything. Trials should be set up to get as many people as possible to purchase at the end of the trial period. They can spend some time seeing the value of your membership, which will make them more likely to buy.
Discount Codes
If you have a digital product shop or even an e-commerce store for physical products, discount codes are a very effective lead magnet. It’s a win-win: you collect an email address that you can send marketing emails to, and the customer gets a coupon, which also increases the likelihood of them making a purchase.
How to Create a Lead Magnet
When creating a lead magnet, it’s important to keep your target audience in mind. You want to create something that provides value to them and addresses their pain points. Here are some steps to follow when creating a lead magnet:
Step 1: Identify Your Target Audience
Before creating a lead magnet, you need to identify your target audience. Who are they? What are their pain points? What do they want?
- What do people need to know/do before they’re ready to buy from you?
- What’s the main problem people are struggling with when they’re ready to buy from you? Could you give them a quick win related to that?
Once you have a clear understanding of your target audience, you can create a lead magnet that resonates with them.
Step 2: Choose a Type of Lead Magnet
Choose a type of lead magnet that aligns with your target audience’s needs and preferences. For example, if your target audience is interested in health and wellness, an eBook on healthy eating habits or a checklist for a healthy lifestyle could be effective lead magnets.
Step 3: Designing Your Lead Magnet
Design your lead magnet to be visually appealing and easy to read. Use images, graphics, and colors that align with your brand and target audience. Make sure the content is well-written and provides value to your audience.

Don’t want to start from scratch? Get one of my E-book/Workbook Templates to get you started quickly! They’re available in US Letter as well as A4 size.
Step 4: Create a Landing Page
Create a landing page for your lead magnet that clearly explains what it is and how it provides value to your audience. Include a form for visitors to fill out in exchange for the lead magnet.
Step 5: Promote Your Lead Magnet
Promote your lead magnet on social media, your website, and other marketing channels. Make sure to target your promotions to your target audience.
Need help creating your lead magnet or setting up the tech for it? Work with me.
How to Name a Lead Magnet: Ideas, Titles, and Examples
When naming your lead magnet, it’s important to choose a title that makes it clear what it’s about and what it is – so people know what to expect when they sign up. You can use a more catchy and attention-grabbing headline on the landing page or popup forms. Here are some ideas and examples for titles:
- The Ultimate Guide to [Topic]
- [Number] Tips for [Topic]
- [Topic] Checklist
- [Topic] Workbook
- [Topic] Cheat Sheet
- [Topic] Template
- [Topic] Quiz
Lead Magnet Examples
Here are some examples that might spark ideas for lead magnets:
Ebook Lead Magnet Examples
- The Ultimate Guide to Social Media Marketing
- 10 Ways to Boost Your Productivity
- The Beginner’s Guide to Investing
- The Ultimate Guide to Email Marketing
- 10 Secrets to a Successful Online Business
- The Ultimate Guide to Social Media Marketing
- 5 Steps to a Healthier Lifestyle
Checklist Lead Magnet Examples
- The Ultimate Travel Packing Checklist
- The Home Buying Checklist
- The Wedding Planning Checklist
- The Business Launch Checklist
- The Ultimate Checklist for Planning Your Dream Vacation
- The Essential Checklist for Starting a Business
- The Ultimate Home Cleaning Checklist
Are you a health or wellness coach? You may be interested in these 37 Lead Magnet Ideas for Health and Wellness Coaches that you can use to attract new leads to your business.
What is a landing page?
A landing page or opt-in page is a stand-alone web page that provides more details about the lead magnet and gets visitors to join your email list. You can link to this page directly from your social media channels, or when you’re in front of someone else’s audience, like you’re giving a video training during an online summit or you’re a guest on someone’s podcast.
You don’t need a separate landing page builder software. You can just use whatever you already have to build pages on your site – like Elementor PRO (affiliate link). Most mailing list providers, like Mailerlite (affiliate link) or ConvertKit (affiliate link), also have the option to build landing pages with them.
I recommend creating your landing pages directly on your website, so you can see your traffic data and set up goals in Google Analytics.
Lead Magnet Landing Page Examples
The most effective landing pages are simple & straightforward – no distracting navigation, no mixed messages, and only one clear call-to-action (CTA).


Other ways to allow people to sign up
Apart from the landing page, you can also put an opt-in form or pop-up on your blog posts, or other website pages such as your homepage, about page, etc. This allows you to capture visitors on your website even if they don’t visit your landing page. Most mailing list providers, like Mailerlite (affiliate link) or ConvertKit (affiliate link), have their own pop-up builders so you can create a pop-up and simply copy and paste the code to your website to make it show up. If you’re using a page builder on your website, like Elementor PRO (affiliate link), they usually also include a pop-up builder.
Conclusion
Lead magnets are essential for growing your email list and attracting potential customers. By creating an irresistible lead magnet that provides value to your target audience, you can establish trust and build a relationship with them. Use the lead magnet ideas, titles, and templates provided in this guide to create an effective lead magnet and start growing your email list today.
Need help creating your lead magnet or setting up the tech for it? Work with me.
Easily start automating your small business with these books
Do you want to automate your online business, but don’t know what to automate or where to get started? These 3 books are great for when you’re just getting started with small business automation. They’ll not only tell you why you should automate your business, but also help you figure out how to streamline your processes so you’re not wasting time or money on setting up unnecessary automations.
Built to Sell
Written like a novel, Built to Sell tells the story of a business owner overwhelmed with having to do a lot of tasks himself. Because he’s not able to take a vacation and step away from his business at all, he’s over it and wants to sell his business. He has a mentor that guides him to streamline his business to make it more valuable & ready for sale. Those tips are also compiled at the end of the book.
It’s geared towards business owners with a team of employees, but even if you don’t have employees yet or want to stay a solopreneur and you’re not even remotely considering selling, there are still good nuggets to get you to think about how you can streamline your business so you can enjoy a vacation without hurting your business.

SYSTEMology
The SYSTEMology book will help you map out what you’re currently doing – your current systems (even if you don’t think you currently have systems), and use that as a baseline to measure & improve things.
When I was preparing to write this post, I saw there are some bad reviews on Amazon about needing to sign up for the email list to get extra resources, then being bombarded with emails and it being hard to unsubscribe. I really dislike when you need to sign up to the author’s email list to get the resources you need to follow along. I never sign up for extra resources, unless I’m already on the author’s mailing list for other reasons anyway. After seeing the reviews, I’m glad I didn’t sign up for the extra resources. I didn’t feel the need, and I didn’t miss them. The sheets you need are in the book, you can just re-create them for yourself in whatever works for you – Word, Google Docs, Evernote, etc.
Like Built to Sell, this book is geared towards agencies and business owners that already have a team of employees in place. That said, there are still good nuggets for solopreneurs. If that’s you, instead of having human team members map out their workflows, use the examples and SYSTEMology framework to map out your systems yourself and think about what you can optimize and automate to take the pressure off yourself.

Automate it with Zapier
Apart from introducing you to Zapier, including a clear overview of all the terms, Automate it with Zapier helps you to simplify your processes and identify what can be automated. It shows you how to build your first automated workflow (or Zap), then goes on to walk you through more complicated setups as well as troubleshooting. It also has a lot of examples to help you automate different processes in your business.
If you’re already familiar with Zapier, you can skip the explanations and just read “Preparing to Automate Your Processes” where you’ll map your processes, figure out what you can simplify, and then identify what can be automated. Then go straight to the examples at the back to get more ideas for things you can automate in your business.

Books on automation for small business
There are a lot of books on small business automation, but not all of them are easy to follow when you’re just getting started with automation for your small business. If you pick up a book that’s too advanced, it can quickly become overwhelming. These 3 books will help you automate your business by mapping your current processes, figuring out where you can streamline & optimize your business processes, and what to automate.
How to create your brand kit in Canva: easy & step-by-step
So you’ve just got some new Canva templates, but you don’t want your brand to look like everyone else. Once you’ve decided on the colors and fonts for your brand, you can set up a brand kit in Canva. In this blog post (and video), I’ll show you how to create a brand kit in Canva, so you can easily customize any template for your own business. Branded templates will help you create a consistent brand look across your digital products and social media graphics, which will help people recognize your brand over time.
When you log into Canva there’s an item called Brand in the left navigation under Tools, where you can find your brand kit and brand templates.
In your brand kit, you can set your brand’s colors, fonts, and logo, which you can then use to create a cohesive look across all your designs. In the free version of Canva, you can only add three colors. If you want more colors, or you want to use your brand fonts and upload your logo, you’ll need to upgrade to Canva Pro (Get your 30-day free trial).
Creating a brand kit in Canva makes it easy to customize templates and create a consistent look for your business.
Add your logo and brand colors to your Canva brand kit
To add your logo to the brand kit, click the plus and select your logo file. It will automatically select the colors from your logo to create a new palette.

You can then add new colors to your palette by clicking the plus and adding in your color code. Or you can delete the palette. You can also pick one of the default palettes in Canva.

How to upload custom fonts for your Canva brand kit
I’ve purchased this font from Creative Market that I’m going to install in Canva. When you download a font, you’ll most likely get a zip file. Before uploading it to Canva, double-click the file to unzip it.

Now we get a folder that has these font files in it. It has OTF and TTF, which are the files that you can use to install the font on your computer, and WOFF and WOFF2 which are files that you’ll need when you want to use the font on your website.

So back in Canva, you can upload a font, and you can pick any of these font files. You can then use the uploaded font in one of your text styles. You can upload multiple fonts, or pick one of the default fonts for your other text styles.

How to share your brand kit
To share your brand kit, you can invite members to your team, which is useful for when you have a virtual assistant creating graphics in Canva for your brand, or you can create a brand board graphic in Canva and share that.
How to customize templates using your Canva brand kit
To use your brand kit in Canva go to styles, and click your fonts to apply your brand fonts to the template. Click “Apply to All Pages” so that your brand fonts replace the fonts on all pages of the template.

How to apply your brand colors to your templates
You can do the same with your colors, but that just shuffles them. And when you apply to all pages, you might not be getting quite what you were hoping for.

So instead of using that feature to apply your brand colors to all pages, select an element and change its color. Then we can change all elements with this color to one of your brand colors. Repeat this for other elements as well as for the text. After doing this, your template has your brand fonts and your brand colors.
Finding stock photos in Canva based on your brand colors
Did you know that you can also find photos based on your brand colors in Canva? Go to photos and in the search bar click this little icon then add your color.

Click “Apply filters” and you will get all photos and images that have your brand color in them. You can then use these photos in your template.
How to create multiple brand kits in Canva
If you have multiple businesses or work with clients in Canva, you can add a new brand kit for each. To select a different brand kit, go-to styles and click the brand kit name.

After clicking the brand kit name, a popup will show allowing you to select a different brand kit to use.

Now that you know how to create your brand kit and how to use it to customize your templates, learn how to create a fillable PDF workbook using Canva so that you can create opt-in freebies and course materials from the templates that now match your brand.
How to create an interactive, fillable PDF workbook using Canva
Whether you want to make a workbook for an online workshop, a welcome guide for clients, a planner, a lead magnet, or any other kind of digital workbook or fillable worksheet, read on (or watch the video below) for the step-by-step on how to create a workbook in Canva and how to add fillable fields to it.
Don’t want to start from scratch? Get one of my E-book/Workbook Templates to get you started quickly! They’re available in US Letter as well as A4 size.
Note: Both Canva and PDFescape have updated their interface since recording this video. I’ve added updated screenshots below in the blog post.
Before you start designing
Write & Edit your text ahead of time, so it’s done and ready to go when you start designing
Before you start designing, I recommend you write the text for your workbook or worksheet in Google Docs or something similar, the design process will go much faster if your text is already done and ready to go.
DIY Design tip: Keep it simple
And when you’re designing your workbook in Canva, one easy way to make your DIY design look great is to keep it simple. Don’t go overboard with colors, patterns, and background images.
For workbooks and worksheets especially, keep it simple. Be kind to your people. Some people might prefer to print it out and fill it out by hand. So you don’t want to use a lot of colors everywhere.
Don’t add multiple single-line text boxes for paragraph answers
When clients hire me to redesign their workbooks, I notice one common pitfall a lot of DIY-ers make. They’ve created lines for their students or participants to write on, then added single-line boxes to type in on each line.
The problem with this is that people can’t keep typing but would have to click over to a new line instead. It’s easier for your workshop participants to fill out digitally if the fillable parts are boxes that have multi-line fields, so they can keep typing and it just uses the space there is, instead of them having to click on another line if they type a lot of text.
How to design your workbook in Canva
Create a new design in Canva. It can be any size you like, although common sizes are US Letter or A4 (international). I use A4 size in the video as well as in the screenshots below.
How do you create a digital workbook from a template?
Don’t want to start from scratch? Get one of my E-book/Workbook Templates to get you started quickly! They’re available in US Letter as well as A4 size.
My E-book/Workbook Templates have 89 pages including cover page designs, section/chapter title page layouts, and A LOT of different types of content page layouts, such as roadmaps, challenges, and planners, and of course, worksheet pages.
Choose from multiple page variations, duplicate and rearrange pages to create endless ebook and workbook layouts.
Designing the title page for your interactive PDF workbook, planner or guide
Click Photos on the left-hand side and choose a photo to use as the background image for your cover page.
Depending on the photo, you may want to add a block where you can put your title. To do so, click Elements on the left-hand side, and select a square or another shape you want to use for this. You can use a color or use a white block that you make slightly transparent.
Click Text on the left-hand side and add your title. You can also add your name, program or course name, and any other information you want to add on your title page.

Designing a worksheet for your editable PDF workbook, planner or guide
Click Text on the left-hand side and add a heading, subheading, or body text, or pick from one of the text templates Canva provides. Change the font and color to make it fit your brand. Add some text to introduce your worksheet and explain everything someone needs to know before filling it out.
Then, add the visuals for your fields. Add the labels or questions for the fields the same way you add any other text. Add the field background by using shapes from the Elements menu in Canva.

When you’re done designing your worksheet, download by click the Share button in the top right corner of Canva, then click Download. Download it as a PDF. For our purposes, whether it’s Standard or Print doesn’t matter.

How to add fillable fields to your PDF workbook or worksheet and make your PDF interactive
Open the free online PDF editor from PDFescape. Select Upload PDF to PDFescape and upload the PDF you just created in Canva. At the top left, you can choose to insert a Form Field. You can choose from these types:

Text – for just one line of text, such as name or email address, or a paragraph of text, like a comment box. See below for how to create a paragraph or multi-line text field.
Checkbox – For a “Yes, I agree” checkbox, or, of course, a checklist.
Radiobutton – For a list of choices where only one choice can be made, like Yes/No.
Dropdown – For a list of choices where only one choice can be made. The list is only visible when it’s opened by clicking the arrow. Useful for a large list of choices, such as countries or U.S. states.
Listbox – Similar to a dropdown, but shows more options at once and allows for multiple options to be selected.
Reset button – clears input from all the fields
Submit button – if you want the form to be sent somewhere
Click and drag over the fields you designed in Canva to create the fillable fields.
If you make a mistake, you can change the size of the fillable fields by first clicking the Edit button (or pencil, if there’s no text for these buttons on your screen size) at the top.

Then click the field you need to edit, and an outline with dots will appear. Click and drag one of the dots to change the size of the field.

If you want to create a field for a paragraph of text, you’ll need to add a regular text field first. Then, in Edit mode, click the wrench icon.

Then, in the field settings, select the checkbox for multi-line and click OK.

If you need to delete a field, you can also do this in Edit mode. Simply click the field you need to delete to select it and click the trash can at the top.

Finally, click the purple arrow icon to save & download your fillable PDF.

Open the PDF you downloaded, check that your interactive workbook is working as expected, go back and make changes if needed, then upload it to your website, your course platform, or if you’re creating an opt-in freebie, your mailing list provider.
25 launch post ideas for digital products
If you’ve ever launched before, you know you NEED to get all your social media done BEFORE you launch. Why? Because you will grow tired of talking about your offer so much.
With these 25 social media post ideas for your next launch, you can get your Instagram, Facebook and other social media promos handled ahead of time. Take what you want, tweak as needed, and get them scheduled. Then strike it off your launch to-do list!
Want to create your social media images quickly as well? Get my Social Media Templates for Canva so you can have all your launch posts done and scheduled in no time!
Need help with the tech setup for your launch? Hire me to take care of it, so you can get back to business.
Social media post ideas explained
Handing you a bunch of social post ideas isn’t all that useful unless you know what they mean. Here’s your cheat sheet for the social media launch post ideas coming up later in this post:
- [PRODUCT NAME]: Enter the name of your product, program or course here.
- [PRODUCT TYPE]: What kind of product is this? (E.g. an e-book, coaching program, course)
- [PRODUCT BENEFIT]: What does this product offer? (E.g. to help you launch without overwhelm, to grow your YouTube channel, to heal your digestive issues, etc.)
- [PRODUCT FEATURE]: A specific feature/module/tool/formula that will help your customers get one of the product benefits.
- [PRODUCT WHY]: What lead you to creating your product? What happened in your life or business, or what did you see other people struggling with that you wanted to create the solution for?
- [PROBLEM]: What problem do people struggle with that your product offers the solution for?
- [LINK]: Insert the URL to where you want to direct people, such as your sales page or enrollment form. Or replace with “Link in bio”/”Swipe up” depending on where you plan to use it.
- [DISCOUNT]: The amount of savings off your product, program or course.
- [BONUS]: The name of your bonus offering.
- [DATE] or [TIME]: Fill in the associated date and/or time (e.g., course closes at 8:00pm EST tonight). Be sure to include the timezone to avoid confusion.
- [TIMELINE]: How long your free challenge/paid program takes.
- [CUSTOMER NAME]: Name of your customer/client. You can also insert your customer’s Instagram handle instead.
- [Option one/option two/option three]: Pick the option that fits your situation (i.e. are you offering early bird pricing or early bird bonuses; is it a free webinar, masterclass or workshop?)
Launch post ideas for pre-launch
I have something new and exciting coming soon. I think you’re gonna love it!
Get on the early bird waitlist if you want to be the first to know about it. [LINK]
I created [PRODUCT NAME] because [PRODUCT WHY].
And now it’s almost here!
Sign up to be the first to know when it’s [open/available]. [LINK]
COMING SOON! I’m launching [PRODUCT NAME] in just a few days.
Join the waitlist to get early bird [pricing/bonuses]. [LINK]

FREE [WEBINAR/MASTERCLASS/WORKSHOP]: [TITLE OF YOUR WEBINAR/MASTERCLASS/WORKSHOP].
Get [PRODUCT BENEFIT] without [PROBLEM] – join me on [DATE] at [TIME]. [LINK]
FREE [WEBINAR/MASTERCLASS/WORKSHOP]: [TITLE OF YOUR WEBINAR/MASTERCLASS/WORKSHOP].
Join me on [DATE] at [TIME] and learn [what they’ll learn].
Sign up now: [LINK]

Do you feel like you’re doing all the right things [in your biz/for your health/etc.] but you still struggle with [PROBLEM]?
[PRODUCT WHY]
This is exactly why I created the [CHALLENGE NAME] FREE CHALLENGE – so you can [PRODUCT BENEFIT] without [PROBLEM].
In [TIMELINE], we’re going to:
✔️ Achievement #1
✔️ Achievement #2
✔️ Achievement #3
We’re starting on [DATE or DAY e.g. Monday] so don’t miss out! Join the [CHALLENGE NAME] FREE CHALLENGE: [LINK]
Social media post ideas for cart open/early bird
I’m excited to announce that [PRODUCT NAME] is [OPEN/AVAILABLE]!
Whether you’re trying to [PRODUCT BENEFIT] or [PRODUCT BENEFIT], this [PRODUCT TYPE] is for you!
Sign up now: [LINK]
Early bird [pricing/bonuses] ends at [TIME]! Don’t miss it! [LINK]
Instagram caption templates for during the launch
Thinking about signing up for [PRODUCT NAME]?
Everything in this [PRODUCT TYPE] is normally only available to my one-on-one clients.
Here’s your chance to experience [PRODUCT BENEFIT] WITHOUT making a [$PRICE OF YOUR ONE-ON-ONE OFFER] investment: [LINK]
Not sure if [PRODUCT NAME] is right for you? Read this to find out more: [LINK]
[PRODUCT BENEFIT ONE], [PRODUCT BENEFIT TWO] and more. It’s all here: [LINK]
Are you ready to stop struggling with [PROBLEM]?
Inside of [PRODUCT NAME] I cover:✔️ [PRODUCT BENEFIT ONE]
✔️ [PRODUCT BENEFIT TWO]
✔️ [PRODUCT FEATURE] so that you can [PRODUCT BENEFIT]
[PRODUCT NAME] is open right now – but it’s only available until [DATE] at [TIME]! Join now: [LINK]
Q&A TIME! I’ve gotten a lot of questions about [PRODUCT NAME].
[Q&A1, e.g. What is [PRODUCT NAME] about?]
[Q&A2, e.g. Who is [PRODUCT NAME] created for?]
[Q&A3, e.g. [Time/money objection]. Why should I join now?]
If your question isn’t answered, leave a comment below!
(Or use the Questions sticker if using this in your IG Stories)
Social proof
Worried that [PRODUCT NAME] won’t work for you? Meet [CUSTOMER NAME].
They joined [PRODUCT NAME] when struggling with [PROBLEM].
After [PRODUCT NAME] they now [PRODUCT BENEFIT].
Ready to stop struggling with [PROBLEM] too? [LINK]

[TIMELINE] can change your life
It might be hard to imagine how quickly things can change when you join [PRODUCT NAME], so let me share some REAL client examples.
After [TIMELINE] in [PRODUCT NAME], [CUSTOMER NAME ONE] [achievement].
And after [TIMELINE], [CUSTOMER NAME TWO] [achievement].
It is possible for you too! Join [PRODUCT NAME] now: [LINK]
[Testimonial text]
– [CUSTOMER NAME]Want to get [PRODUCT BENEFIT] too? Join [PRODUCT NAME] now: [LINK]
Discounts
Who doesn’t love a deal? Until [DATE] receive [DISCOUNT] off [PRODUCT NAME]. What are you waiting for? Don’t miss out! [LINK]
If you’re thinking of using [PRODUCT FEATURE] to [PRODUCT BENEFIT], now is the perfect time to learn how. Get [DISCOUNT] off [PRODUCT NAME] when you sign up now. [LINK]
Bonuses
BONUS TIME! Get [BONUS] when you sign up for [PRODUCT NAME]. Find out more at [LINK]
Receive [BONUS] when you register for [PRODUCT NAME] by [DATE]. [LINK]
Social media caption templates for cart almost closed
Seats are filling up for [PRODUCT NAME]. There are just # spots left, so if you’ve been considering enrolling, don’t miss your chance! [LINK]
# HOURS LEFT! [PRODUCT NAME] will be closing its doors at [TIME]. GET IN NOW: [LINK]

Launch post ideas for cart closed
[Registration/Enrollment] for [PRODUCT NAME] is closed! I’m so excited to help # new students get [PRODUCT BENEFIT]! If you missed out, sign up to be the first to know when it’s available again. [LINK]
Doors are closed for [PRODUCT NAME]. Sign up now so you don’t miss the next round: [LINK]
If you weren’t quite ready to invest in [PRODUCT NAME] but are still struggling with [PROBLEM], you can get started for free with [OPT-IN FREEBIE NAME]. [LINK]

Want to create your social media images quickly as well? Get my Social Media Templates for Canva so you can have all your launch posts done and scheduled in no time!
9 common sales page mistakes and how to fix them
Did you create your sales page yourself and have no clue why it’s not making sales? Keep reading to find out if you’re making one of these 9 common mistakes solopreneurs make when they create their own sales pages.
Now, before we get into the mistakes, you need to know whether there’s actually a problem with your sales page. Did you calculate your conversion rate, and do you know how it measures up against benchmarks?
Next, you need to check if you’re getting enough traffic to the page. If you find you’re not getting a lot of traffic, my post on how to get more traffic to your sales page might help you out.
So, if you’re getting enough traffic but your sales page really isn’t converting, you might be making one of these common mistakes.
#1 Did you pre-validate your offer?
Did you create your offer based on market research, or just because you wanted to? If you didn’t do market research, it could be that it’s just not something your audience actually needs or wants, or maybe the structure of your offer isn’t quite right for your target market.
Maybe your audience doesn’t have 2 and a half hours to watch your workshop – but if you broke it down into a program of 30 minutes each day for 5 days, they can work with that.
#2 Copywriting mistakes
You need to speak your ideal client’s language, the words they’d use to describe their problem, and their dream solution.
There are two common copywriting mistakes I see on sales pages. The first is that there’s no clear opening headline. Your opening headline needs to grab people’s attention and hook them. Your reader should feel like you’re talking directly to them.
The second copywriting mistake is that you’re not clearly communicating the value of what you’re selling. That means not just talking about the features of what they get, but the transformation and the benefits they will see after going through your program.
#3 Your page takes too long to load
You can check your page load time with a tool like PageSpeed Insights or GTMetrix. They will not only tell you how long it takes for your page to load but also what you can do to speed it up.
One common issue that causes long load times, is uploading huge images. Resize images to the size you actually use them in, that way the file size is a lot smaller, and your page loads quicker.
#4 First impression
Your design needs to appeal to the right audience, and you need to make sure the first impression doesn’t turn people off. Establish trust and credibility with a professional-looking, well-put-together page.
#5 Too many distractions
The sales page for a signature program shouldn’t have a navigation menu to the rest of your site, so make sure to remove the header and footer, as well as any pop-ups and social media links from your sales page.
Another way your sales page could be distracting is when there’s too much going on in terms of different fonts, colors, backgrounds, and images – and it’s just too chaotic.
#6 Buttons don’t stand out
Make sure your Buy button looks like a button and not just a small link, it needs to stand out. Make your button a contrasting color, or even a contrasting background for the entire Call To Action section. Include multiple Buy buttons on your sales page, so if they miss one, there’s a good chance they’ll see another one later down the page as they’re reading it.
Try different text on your buttons – not just Buy Now, but Let’s get started or Yes, I want and then a result they’ll get from your program.
Using a PayPal button? You might be interested in How to create a custom PayPal buy now button.
#7 Not enough visuals
Include a mockup of your product, program, or course. If people can’t see what they’re getting, they’re less likely to buy.
A video showing what’s inside works especially well, show them how your program is set up inside a course portal, and walk them through the different modules and resources they’re getting. Don’t show too much, of course – but just an overview of what’s inside.
#8 Not showing enough social proof
You need to include testimonials or reviews. If you don’t yet have testimonials for a new program, you can include more generic ones that talk about your other programs or what it’s like working with you. But do make it clear that your program is new and that you’re not including testimonials talking about results that are not about this specific program.
Also, make your testimonials look like testimonials. Show your reader that these are real people giving you a testimonial.
#9 Not mobile-friendly
I don’t know about you, but by now, I kinda expected everyone to be aware that their sites and sales pages need to be mobile-friendly. And yet, I still see sales pages and websites that aren’t. If your sales page isn’t mobile-friendly, you’re missing out on sales.
Now that you know these common mistakes, you can avoid them.
If you’re creating your own sales page, get my Sales Page Blueprint below to learn what to include on your sales page and how to structure it so more ideal clients click that buy button!
Sales page stressing you out?
Fill in the fields below to download my free Sales Page Blueprint and learn the 9 sections
every sales page needs (and exactly what to put in each section)
so more people click that buy now button!

I will NEVER sell or share your email address. You must be 16 or over.
